
Job Description
The hockey stick chair is a project that’s guaranteed to turn heads. It doesn’t involve many special tools, but does involve a couple more types of hardware than usual. A smartphone with a level app is a must, as the angles are small and a digital readout makes things a lot easier.
Materials Required:
- Mitre Saw
- Circular saw
- Drill
- Bubble level / cell phone
- 4 bar clamps (2 greater than 3 ft)
- Around 20 sticks
- 2 goalie sticks
- 1 box of #6, 1.25” wood screws
- 1 box of #4, 1.25” wood screws
- 1 box of #6, 1.5” wood screws
- 4 #8, 1.25” wood screws
- 1 box of 1.5” finishing nails
- Liquid Nails / glue
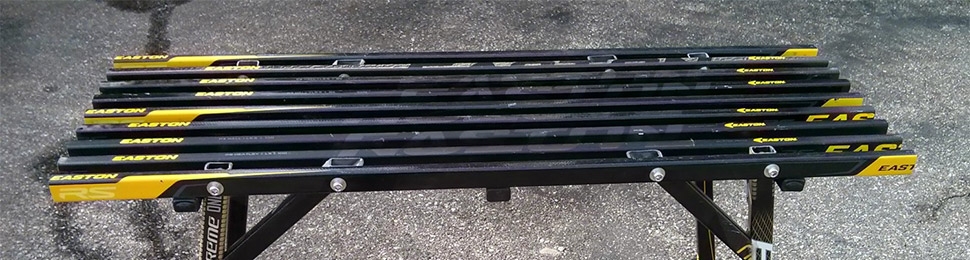
Building the seat
When I made the chair, I just used the mitre saw and a template. This greatly simplified the construction process for me, and I was willing to deal with tiny gaps at the ends since they would be covered. The seat width is 20”, and I made the overall seat depth a total of 14.5 sticks in the end. The measured depth depends on your stick widths. In the end, plan on about 17” for depth. Shown below is the attachment for the first 13 sticks. Don’t include the 14th, which will be at the back, or the 0.5, which will be at the front. The front most stick will be angled, which will cause slight problems will the supports, but we’ll cross that bridge later.
Building the legs
Now that the seat is made, we’re going to make and attach the legs to the sides. This is where the math starts to come in because the seat needs to decline 5 degrees. This would be a great time to break out your digital readout bubble level. I chose to make the top of the seat 18 17/64” (ish—a big ish) from the bottom. Therefore, the back seat must come down about 1.315 inches. Now cut the 10 degree angle into the vertical rear support sticks as seen two figures down.
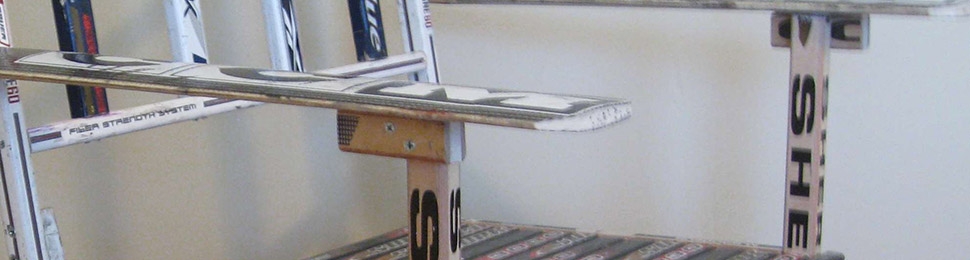
The figure below shows how it’ll all come together. The arm rests are 26” high and you’ll put a single #6, 1.25” in the front stick and another in the attachment stick.
Make sure the 14th stick is level with the horizontal when attached. It’ll make your life a little easier. Screw in the 2 #6, 1.25” from the side as shown, and then screw the 14th stick to the attachment plane stick from the bottom with a #4, 1.25, avoiding the #6. The #4 isn’t shown since you’ll have to be creative in getting it in there.
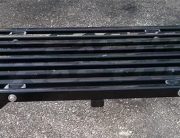
Building the bottom support
Next we’ll connect a bottom support to add some rigidity to the legs. You can build it separately and attach or do one piece at a time to the actual chair.
You do need a double screw in each leg to keep the sticks from turning in place or the whole thing from racking. Use #4 if you’re uncomfortable squeezing stuff in or #6 if you’re comfortable.
Building the back
We’re going to make the back separately from the rest of the chair and then integrate it. Integration is important to get right or you’re going to create a weak joint that may potentially fail.
Shown here, the chair back has to maintain the seat’s 20” width plus two sticks. It’s going to sit directly on top of the legs you cut earlier at 10 degrees. The top corners are cut at 45 degrees to make a nice smooth edge. I highly recommend using the exact same stick or style of stick for the top and two sides of the back. You don’t need the double screws at the corners; you can use Liquid Nails or another glue.
You need at least 3” from the bottom of the back to that first cross member, shown as 4 17/64” here. This is for your butt to stick out. Also, I choose to make the 4 vertical supports attach right up to the front of the back. You can see the screws aren’t centered. This provides more surface area for the chair to actually support your back. The alternative is recessing them into the middle of the cross beams. Up to you. Shown below is the rear view of the back.
The four vertical beams need a double screw in at least one side. This will keep them from spinning in place. I did it on the bottom, where people will see fewer screw heads. I used #4, 1.25” for this.
Now the bottoms of the outermost back-support sticks shown to be 17 1/64″ earlier need just a normal straight cut. Placing them on the legs will force the back to be at 10 degrees, since you made the angle cut previously.
Attaching the parts
There is a small attachment piece that connects the back to the legs. It’s 4.5” long and I had it cut to be at an angle of 75 degrees from the horizontal. I really recommend attaching these pieces to legs first using 2, #8 1.25” wood screws to bulk things up. Get the attachment piece as flush against the #14 stick in the seat as you can. Then attach the chair back to the attachment piece using three #6 screws, again making sure the back is as flush to the top of the legs as possible.
Arm rests
Arm rests will be more comfortable and add a significant amount of rigidity. To make them, cut both goalie sticks to look like this:
Cutting some off the corners off at 45 degrees makes the edges less sharp. Cutting the rear of the goalie stick at slightly greater than the 10 degree back angle allows for error when mounting the arm rests to keep a corner from sticking out.
The arm rest shown here isn’t quite at horizontal. It’s up to you if you want it at zero degrees or not. You’ll need to create the arm rest attachment pieces which connect to the front legs via 2 #6, 1.25” as shown but also connect to the arm rest via #6, 1.5” from the bottom. 1.5” should be just the right amount if things are centred. You’ll need the 1.5” length screws to attach the arm to the back. Use two screws to make sure it holds well.
Seat supports
It might look like a chair, but it isn’t yet. Try sitting in it (gently), and you’ll notice a lot of wiggle in the legs. We’ll add the supports to the legs at the same time we add some of the finishing touches to cover up the sides of the seat.
These are easy to make, and you can cut the angles at the ends to be 45 degrees. You may have to slightly “twist” stick #1 on the front of the seat for it to lie flush with the support, but it shouldn’t be difficult.
Now add some finish to cover up the stick sides and clean up the front. This is where the last 0.5 stick comes in!
Use Liquid Nails and your bar clamps instead of screws for a clean look, and then use a couple of finishing nails. The finishing pieces on the side will need to be cut to the appropriate length as your seat allows, the angles on either side modified for the clean look. It should be 5 degree in the appropriate direction on each side to account for the seat angle.
Again, note the angle of the screws. These are slightly more difficult to put in, as you must accommodate the angling of the seat on the supports.
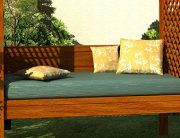
The result
Now you’re all done!
Check your provincial and municipal codes before starting any project. Follow all safety precautions. Information in this document has been furnished by the North American Retail Hardware Association (NRHA) and associated contributors. Every effort has been made to ensure accuracy and safety. Neither NRHA, any contributor nor the retailer can be held responsible for damages or injuries resulting from the use of the information in this document.
